🗺️ Preset Summary
$location_name
$preset_name
🗺️➜🖥️ Import in Waymark Studio
-
1. Copy the Preset Data
Click the button below to copy the preset data to your clipboard.
This page's URL is the preset, so you can copy it directly instead.
-
2. Open Waymark Studio
Open the Waymark Studio window using the chat command
/wmsor by opening the game's waymark window (ctrl + mby default). -
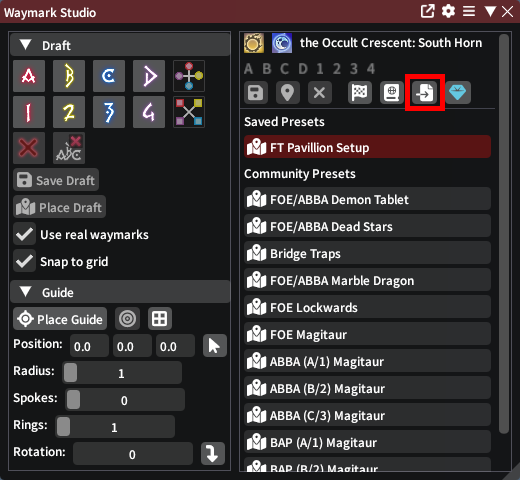
3. Click the Import Button
In Waymark Studio, click the "Import" button. If the preset it copied to your clipboard, the import will complete immediately.
-
4. View or Place the Preset
If you are in the preset's location, it will appear under your "Saved Presets". Click the preset to place it or right-click for other actions. Open the library to see all your presets.
🎁➜🖥️ How to Install Waymark Studio (Click to expand)
-
1. Install XIVLauncher and launch the game
Go to the XIVLauncher GitHub page: goatcorp.github.io and follow instructions.
-
2. Open Dalamud settings
Open Dalamud settings using your preferred method, such as the chat command
/xlsettings. -
3. Navigate to Experimental Tab
In the Dalamud settings window, click on the "Experimental" tab.
-
4. Add the Custom Plugin Repository
Scroll down to the "Custom Plugin Repositories" section and paste
https://puni.sh/api/repository/sourpuhinto the last empty textbox. -
5. Save Changes
Press the '+' button right of the textbox, and then click the '💾' (Save changes and close) button.
-
6. Open the Installer
Open Dalamud plugin installer using your preferred method, such as the chat command
/xlpluginsand open the "All Plugins" section. -
7. Install the Plugin
Search for "Waymark Studio" in the plugin installer and proceed with the installation.
-
8. Open Waymark Studio
Once installed, Waymark Studio can be opened using the chat command
/wmsor by opening the game's waymark window (default hotkeyctrl + m).